How To Make A Crown for Your Dog
Sharing our formula for the perfect dog birthday crown. Help your pup feel like a King (or Queen) on their special day.
Many may think a dog crown is silly but we say “why shouldn’t your pup feel like royalty on their birthday?” After all, they likely will have much less birthdays to celebrate than us.
While he’s with us, we choose to go all out to celebrate ‘Oli.
This also may be a bi-product of the fact that I was binge watching Queen Charlotte in the weeks leading up to ‘Oli’s birthday… but none the less, dog crowns may be silly but they are also fun!
So if you were looking for a formula to craft a nice crown for your pup’s special day, then look no further.
It took a bit of trial and error but I managed to make what I would say is the perfect birthday crown, and yes he had more than one birthday crown.
I know, I know.
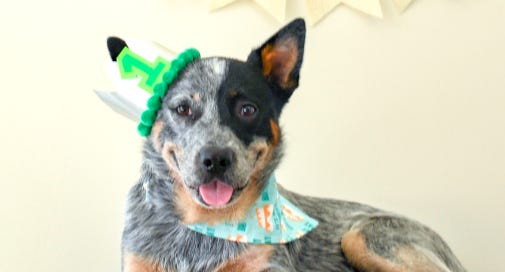
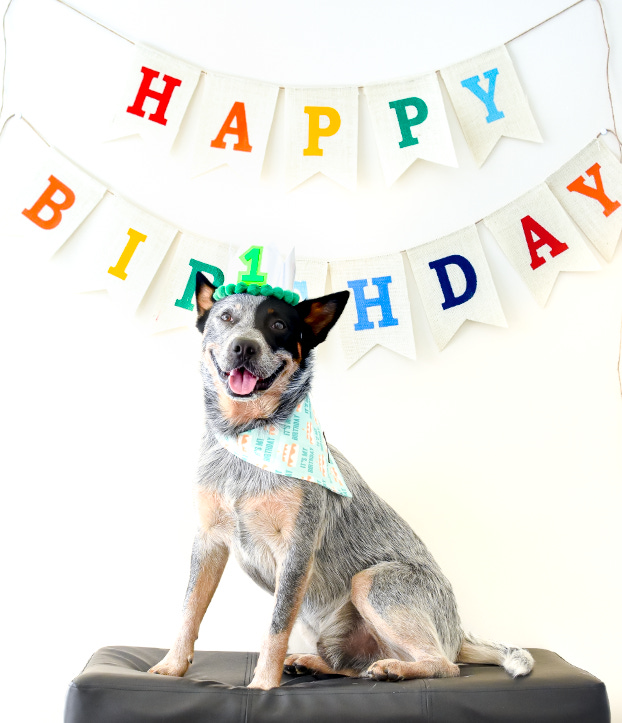
I have already fully admitted to the fact that I am an extra dog mom. Read on for crown making knowledge, humor, and never before seen photos of ‘Oli in his birthday crowns!
Supplies
First you’ll need some supplies…
Poster Board Paper in the colors of your choosing or foam paper
Elastic Thread
Pom poms, size and color of your choosing
Hot Glue Gun & Hot Glue
a pencil and eraser
ruler or measuring tape
An exacto knife
Scissors
Initially I intended to make a sparkly foam paper crown but when I got to the craft store I could not find such a thing so I opted for the thick paper. Though it is worth noting that the crown will be far more durable if you can craft it out of the foam paper.
Yet our current expertise lies in poster board paper crowns only.
Our Formula
I have no memories of previously attempting to craft a crown prior to ‘Oli’s birthday crowns so it took me a few tries before I felt I got the perfect crown, though the perfect crown for ‘Oli may not be the perfect crown for your pup and thus a formula is needed…
Given that dogs can drastically differ in size we get a teensy bit math-y to help you determine the size of crown you need.
For reference ‘Oli has about 4 to 5 inches between his ears so the goal was to get the crown to fill that space. Depending on the size of your dog you may need to increase or decrease the circumference of your crown, our crown has a circumference of 12 inches.
Caution! Math mentioned in next paragraph:
If you want to get math-y about this you can measure the distance between your dog’s ears and then put that number (aka ‘x’) into this equation: 3.14 *x = desired crown circumference. This formula is also known as C = 2 π r.
Whatever number you get from 3.14 * ear distance = the overall length of your crown.
From there you just need to determine how many points you want your crown to have (C / desired points = width of point) and you are set to have the perfect crown for you pup.
I personally rounded down to 12 inches and thought I could easily make a 2 inch crown points so I went with that for my second attempt.
My first attempt was so bad it doesn’t really deserve any recognition, but I will say this, you likely want a crown with more points than 3.
Okay, no more math! (or maths depending on where you are located in the world)
Side note: I have no idea if there is a fancier word for “crown points” so please feel free to inform me if there is.
I feel a bit goofy calling them points as I am almost certain there is a better name for them but I cannot seem to even get a coherent enough question into google search to find the answer I am looking for.
I mean, there just has to be a better word than points, right?!
Aside from the fact that I am writing a blog post on how to make the perfect crown for you dog, I know little to nothing about crowns themselves.
ANYWAY…
Above is a photo of the crown prior to assembly. You can see there are 7 points in this photo and this is because I included 2 extra inches to help glue the crown together, and thus the 7th point disappears upon assembly.
The base of the crown measures 2.5” tall while the points measure 1.5” tall and as I already mentioned 2” wide.
See 6 pointed crown in photo below:
This photo is prior to me adding the pom poms to the base of the crown, however I decided I wanted a crown that was less tall and had 7 points so I made another crown which I consider to be my best work out of all the crowns I made.
Are you laughing at me? I am laughing at me.
If nothing else may this post prove to you how much I love ‘Oli and the care I put into every decision I make for him.
For the final crown I made, the silver crown, I used different dimensions for the base height and crown point widths so I could achieve the crown of my, dare I say it, our dreams.
I went with a 2” height for the base while keeping the 1.5” height for the points. and because I wanted 7 points instead of 6 while still keeping the 12” circumference I decreased the 1.7 inches which is really annoying to measure out. P.S. sorry if you are used to the metric system.
Here is what the silver crown looked like before I cut it.
Is my degree in engineering showing? I am really trying to keep this simple, I promise, plus we are almost done!
TIPS
Because the inside of the crown will be visible it is worth trying to limit your pencil markings I used little dots since the eraser didn’t meet my exceptionally high standards.
Additionally, on crown attempt 2 (green crown) I had unnecessarily measured out an extra point and had a whole fancy pull through attachment system that I totally abandoned. An extra inch or two of paper measured at crown base height is enough to add hot glue to and fuse the crown into a 3D masterpiece, and will keep the inside of the crown looking clean.
At the fuse line is where I added the number 1 so the crown appears seamless.
Perfection!
Once you’ve fused your crown you can decide how many pom poms you would like and if you want them on the points or just the base or both! The options are endless. For next years crown I think I will add a smaller sized pom pom to each point but that just wasn’t in the cards for us this year.
Though I think the pom poms are a great addition to the point not just for pizzazz but because the points are well, point-y. So it is for safety too!
Lastly, you will need to measure out the right amount of elastic thread and hot glue it to the inside of the crown. Add a little bit extra for the portion you will glue and be careful not to burn yourself. Let the one side entirely dry before you glue the next side.
And there you have it this is all our knowledge on dog birthday crowns.
Oh one more tip, don’t use silver paper if you want to have a white background. It makes it very difficult to edit the photos and get the right exposure.
If you read this far we sure are grateful you are here! Make sure you are subscribed.
On the off chance this post goes viral we will do a crown giveaway to one lucky winner! The fate of a crown giveaway is in the palm of your hands… what will you do with all this power?


Adorbs!!!
loved this fun post and the pics of 'Oli on his special day.